In the 
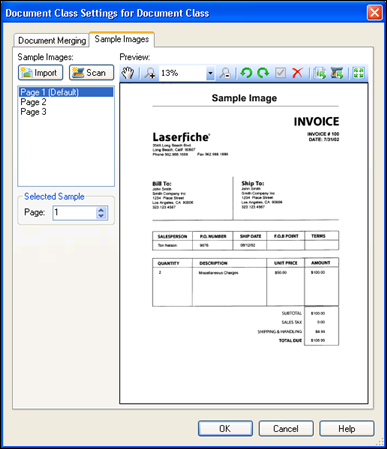
Sample Images tab of the Document Class Settings dialog box, you can view the sample image settings for a document class and modify the sample image to suit your needs. You can have more than one sample image per session, and select the appropriate one for the document class.
To view and modify Sample Image Settings
To import a custom sample image
To scan a custom sample image
You can assign a sample image to a particular page number. This is useful when you are configuring processes or image enhancements to work on only specific pages of each document.
To assign a sample image to a page number
You can set a sample image as the default sample image for the session. This means it will automatically appear in the Display Pane when you are configuring and testing processes.
To set a sample image as the default
You can also view or modify sample images using the Sample Image Toolbar. This toolbar appears above the displayed sample image.
Item | Function |
![]() |
Pans an image. Drag in the direction you want to review. |
![]() |
Zooms in. |
![]() |
Displays an image at a preset zoom setting. Select Fit to match the current size of the Laserfiche Scanning window. |
![]() |
Zooms out. |
![]() |
Rotates an image 270 degrees (left). |
![]() |
Rotates an image 270 degrees (right). |
![]() |
Sets the displayed sample image as the default. |
![]() |
Deletes the displayed sample image. |
![]() |
Replaces the displayed sample image with an imported image. |
![]() |
Replaces the displayed sample image with a scanned image. |
![]() |
Displays the selected sample image in a maximized window. |
For further help or feedback, please see the Laserfiche Support Site. | © 2009 Laserfiche. All Rights Reserved. |